

How To Change A Facebook Page Owner
Introduction
The chown command changes user ownership of a file, directory, or link in Linux. Every file is associated with an owning user or group. It is critical to configure file and folder permissions properly.
In this tutorial, learn how to employ the Linux chown command with examples provided.

Prerequisites
- Linux or UNIX-like system
- Access to a last/command line
- A user with sudo privileges to change the ownership. Recall to run the commands with sudo to execute them properly.
Linux Chown Command Syntax
The basic chown command syntax consists of a few segments. The help file shows the post-obit format:
chown [OPTIONS] USER[:GROUP] FILE(s) - [OPTIONS] – the command can be used with or without additional options.
- [USER] – the username or the numeric user ID of the new owner of a file.
- [:] – apply the colon when changing a group of a file.
- [GROUP] – changing the group ownership of a file is optional.
- FILE – the target file.
Superuser permissions are necessary to execute the chown command.
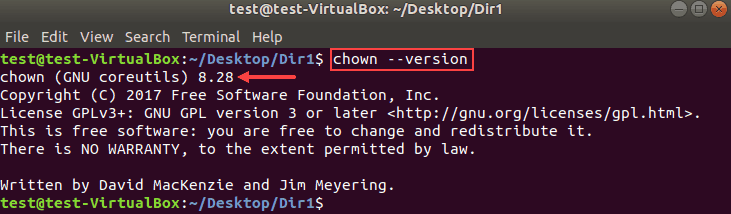
In this guide, nosotros tested the command examples with the chown version 8.28 in Ubuntu 18.04.2 LTS.
To cheque the chown version on your auto, enter:
chown --version The output will expect similar to this:
How to Bank check Ownership of a File in Linux
First, you need to know the original file owner or grouping earlier making ownership changes using the chown command.
To check the grouping or ownership of Linux files and directories in the electric current location, run the following command:
ls -l An example output of the ls command looks similar this:

How to Change the Owner of a File
Changing the possessor of a file with chown requires you to specify the new owner and the file. The format of the command is:
chown NewUser FILE The post-obit command changes the ownership of a file sample from root to the user test:
chown test sample 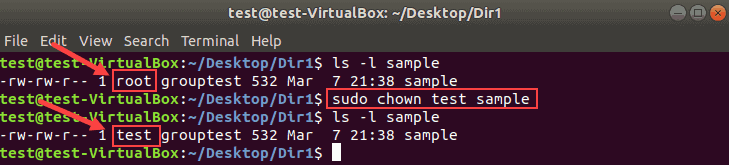
Employ the same format to change the ownership for both files and directories.
Alter the Owner of a File With UID
Instead of a username, you can specify a user ID to change the ownership of a file.
For example:
chown 1002 sample2 Make sure at that place is no user with the same name as the numeric UID. If at that place is, the chown command gives priority to the username, non the UID.
Annotation: To check a user'due south ID, run id -u USERNAME from the concluding.
Change Ownership of Multiple Linux Files
Listing the target file names after the new user to change the ownership for multiple files. Use single spaces between the file names.
In the following example, root volition exist the new possessor of files sample2 and sample3.
chown root sample2 sample3 Combine file names and directory names to change their buying with one command. For instance:
chown root sample3 Dir1 Practise non forget that the commands are case sensitive.
How to Change the Group of a File
With chown, you can change a grouping for a file or directory without changing the owning user. The result is the same as using the chgrp command.
Run the chown command using the colon and a group proper noun:
chown :NewGroup FILE The post-obit example changes the group of the file sample3 from grouptest to group3.
chown :group3 sample3 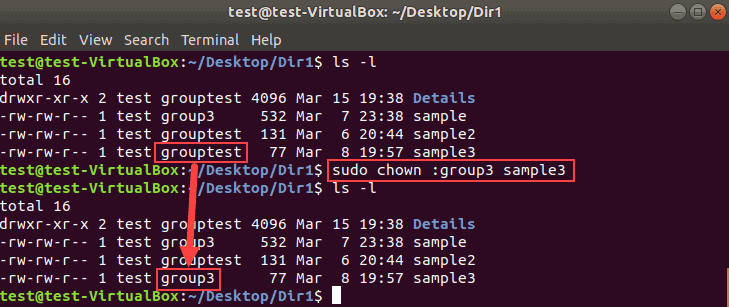
List multiple names of files or directories to make bulk changes.
Modify the Group of a File Using GID
Similar to UID, use a group ID (GID) instead of a grouping name to modify the group of a file.
For example:
chown :1003 sample Change Owner and the Group
To assign a new owner of a file and change its grouping at the same time, run the chown command in this format:
chown NewUser:NewGroup FILE Therefore, to set up linuxuser as the new owner and group2 equally the new grouping of the file sample2:
chown linuxuser:group3 sample3 Call back that there are no spaces before or after the colon.
Alter Group to a Users Login Grouping
The chown control assigns the possessor's login group to the file when no group is specified.
To do so, ascertain a new user followed past a colon, space, and the target file:
chown NewUser: FILE The following instance changes the group ownership to the login group of linuxuser:
chown linuxuser: sample3 Transfer Buying and Grouping Settings from One File to Some other
Rather than changing the ownership to a specific user, you can use the owner and a group of a reference file.
Add the --reference pick to the chown command to copy the settings from one file to some other:
chown --reference=ReferenceFILE FILE Recollect to blazon in the names of the files correctly to avoid the error message:

Check Possessor and Group Before Making Changes
The chown command --from option lets you verify the current owner and grouping and so use changes.
The chown syntax for checking both the user and grouping looks like this:
chown --from=CurrentUser:CurrentGroup NewUser:NewGroup FILE The instance beneath shows we first verified the ownership and the group of the file sample3:
chown --from=root:group2 linuxuser:group3 sample3 Then chown inverse the possessor to linuxuser and the grouping to group3.
Check Owner Simply
The option --from can be used to validate only the electric current user of a file.
chown --from=CurrentUser NewUser FILE For case:
chown --from=root linuxuser sample3 Check Group Only
Like to the previous department, yous can validate merely the group of a file using the option --from .
chown --from=:CurrentGroup :NewGroup FILE Here is an instance where we verified the current group earlier changing it:
chown --from=:group3 :group4 FILE Remember to utilize the colon for both group names to avert fault messages.
How to Recursively Change File Buying
The chown control allows changing the ownership of all files and subdirectories inside a specified directory. Add the -R selection to the command to practise then:
chown -R NewUser:NewGroup DirNameOrPath In the following instance, we volition recursively change the owner and the group for all files and directories in Dir1.
chown -R linuxuser:group3 Dir1 Chown Command and Symbolic Links
To change the possessor of a symbolic link, use the -h selection. Otherwise, the ownership of the linked file volition be changed.
The following image shows how symbolic links behave when -h is omitted.
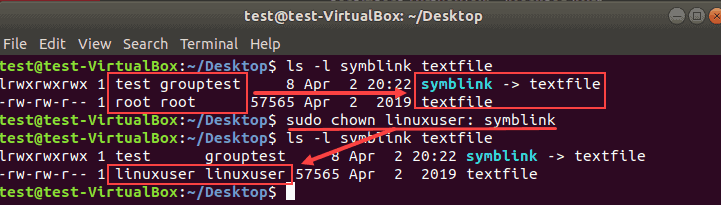
The owner and group of the symbolic link remain intact. Instead, the owner and the grouping of the file textfile changed.
To push the changes to the link, run the chown command with the -h flag:
chown -h NewUser:NewGroup SymbolicLink In the following instance, nosotros changed the possessor and grouping of a symbolic link.

Display Chown Control Process Details
By default, the terminal does not brandish the chown procedure data. To come across what happens under the hood, use one of the two command line flags:
- The option –5 produces the procedure details even when the ownership stays the aforementioned.
- The choice –c displays the output information only when an owner or group of the target file changes.
For instance, if we specify the electric current owner as a new owner of the file:
chown -v linuxuser sample2 The terminal produces the following output:

Switch from -v to -c and there will be no messages in this example. This happens because there are no owner or group changes.
The data is especially useful with the recursive chown command:

In this case, the output lists all objects affected after running the command.
Suppress Chown Command Errors
To avoid seeing potential error messages when running the chown command, apply the -f option:
chown -f NewUser FILE The example below shows the error bulletin for a non-real file or directory:

Adding the -f flag suppresses nearly error letters. However, if you lot specify an invalid username, the error bulletin appears:

Determination
At present you know how to utilise chown command in Linux to change a file's user and/or group ownership.
Accept extra caution when changing the grouping or buying of a file or directories.
Was this commodity helpful?
Yes No

Source: https://phoenixnap.com/kb/linux-chown-command-with-examples
Posted by: wilkinswassert57.blogspot.com
0 Response to "How To Change A Facebook Page Owner"
Post a Comment